Prefill Forms is mail merge for surveys. You upload a spreadsheet, and each row becomes its own personalized survey copy, printed on paper or delivered as a unique web link. When responses come back, every one already carries its row's data, so nothing you knew in advance has to be re-entered or re-matched by hand.
A prefill list can feed a survey in four ways, and you can combine them freely:
| What you want | How to set it up |
|---|---|
| Print a value into an answer field | Name a question to match the column |
| Show a value inside question text | Write {{Column name}} in the text |
| Attach data invisibly to responses | Add a Prefill Data question named after the column |
| Send personal web survey links | Generate one pre-filled link per row |
This guide covers each step in order: building the list, wiring the survey, printing, scanning back, and the web link option.
Step 1: Build your prefill list
Open Prefill Forms and create a new list by uploading a spreadsheet (CSV or Excel). The header row becomes your columns and every following row becomes one survey copy. You can also start from an empty list and add rows in the browser.
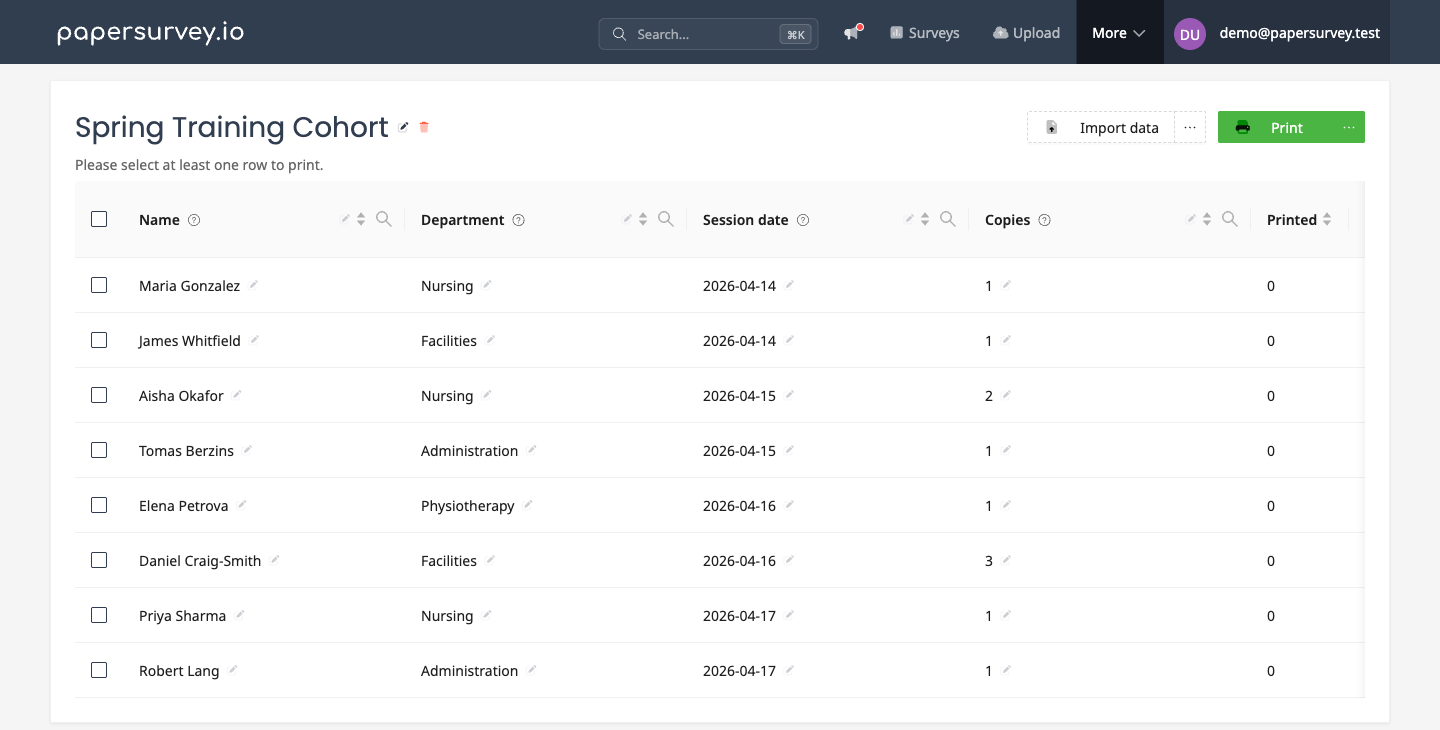
The list is fully editable in place:
- Edit any cell by clicking it. Type the new value and press Enter.
- Add rows one at a time, or import another spreadsheet into the same list.
- Add columns from the menu next to "Import data". A column added as a "copies" column is automatically wired up as the per-row copy count for printing.
- Search and sort every column, and track which rows have already been printed or scanned in the Printed column.
Step 2: Wire the survey
The connection between a column and your survey is the name. When you print, each column label is compared against the names of the survey's fillable questions. Matching is forgiving: capitalization, spaces, and punctuation such as underscores, dashes, and question marks are ignored, so a column called session_date matches a question named "Session date". The print dialog always shows how many columns matched before anything prints.
There are three ways a column can reach the survey. Pick per column, and mix them in one survey.
Fill an answer field
Name a question to match the column, and each printed copy carries that row's value in the question's answer area. This works for short text questions, dates (the value is parsed and split into the printed date boxes automatically), numbers, and emails. The respondent skips what you already know, and recognition treats the printed value like any other answer when the form is scanned.
Insert values into the question text
Write a placeholder in double curly braces anywhere in a question, heading, or description:
Thank you for attending the {{Session date}} training. How useful was it for you?Each copy replaces the placeholder with that row's value. The placeholder must use the column's name as typed, and spaces just inside the braces are tolerated: {{ Session date }} works too.

Replaced text can be longer or shorter than the placeholder, which would shift the layout from copy to copy and hurt recognition. Wrap dynamic text in a height box so every copy occupies the same space:
[height=2cm]Thank you for attending the {{Session date}} training.[/height]Add [width=10cm]...[/width] as well when the surrounding layout is tight. Sizes accept centimeters (cm) or inches (in).
Attach data invisibly
Add a Prefill Data question named after the column. It never appears on the printed or web form, but its value is attached to every response from that copy and shows up in the Responses table, filters, cross tabs, and every export.
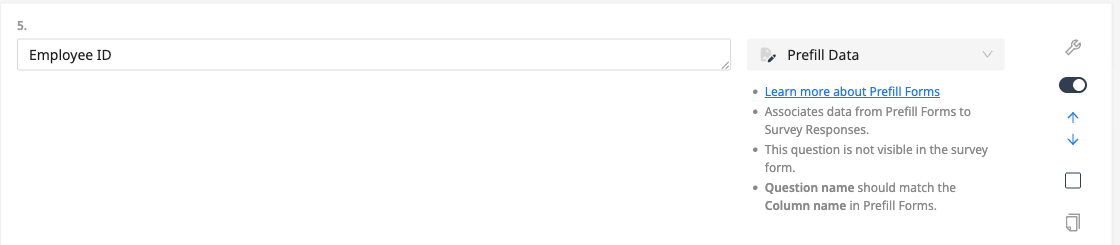
This is the right choice for participant IDs, cohorts, sites, or anything respondents should not see. The survey looks completely generic while every returned sheet stays fully traceable.
Step 3: Print personalized copies
Select the rows to print and press Print. The dialog walks through everything that matters:

- Survey version. Pick which version to print. Next to each version you can see how many of your columns matched its fields, so a naming mistake is visible before printing.
- Copies per row. Print the same number for every row, or take a per-row number from a column, one form per attendee for most sessions, three for the big one.
- Instructions and duplex. Optionally add an instructions page and enable two-sided printing.
- Group in folders. Split the generated PDFs into folders by any column, for example one folder per location.
Under Advanced Settings you can also pick an identifier column (see below), set how many copies go into each PDF file, and adjust the identifier prefix.
Two requirements to know about:
- Unique Page Marking must be enabled, because each copy is identified by the QR codes printed on the page. Multi-page surveys have this automatically; for single-page surveys enable "Uniquely mark single-page surveys" in survey settings. See unique survey identifiers.
- Create a new version after editing. If you change the survey after generating copies, create a new version in the Print tab before printing again.
Identifiers
Every copy receives an identifier that ties the physical sheet back to its spreadsheet row. Leave the setting alone and identifiers are generated automatically. If your rows already have stable unique IDs, choose that column as the identifier in Advanced Settings; every value must be unique. When printing more than one copy per row, identifiers are always auto-generated so each sheet stays distinct.
Step 4: Scan the returned forms
Nothing special. Upload the scanned stack as usual: the QR code on each page identifies the copy, recognition reads the handwritten answers, and the prefilled values are attached to the response automatically. In the Responses table, prefilled fields are marked so you can tell them apart from respondent answers, and every prefill column is available for filtering and in exports.
Back in the prefill list, the Printed column counts how many forms from each row have been scanned. The selection menu includes "Select not uploaded rows", so following up with non-responders is one click, not a spreadsheet reconciliation.
Web survey links
The same list generates personal web survey links, one per row, with all the same wiring: matched fields are pre-filled, placeholders are replaced, and Prefill Data values ride along invisibly. Select rows, choose "Generate links to web survey", and download the spreadsheet of links for your mail merge.
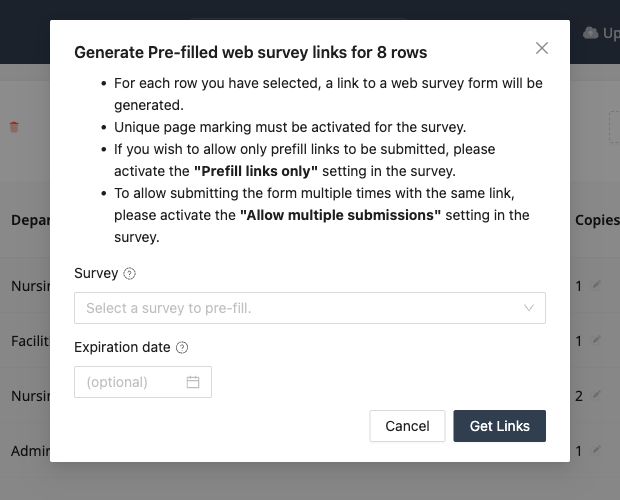
If your survey text contains the survey's plain web address, it is replaced with each row's personal link automatically. Expiration dates and submission rules are covered in Generating Prefill Links in Bulk.
Advanced: several rows on one printed form
If your survey contains a Repeater block, one printed form can carry several consecutive rows, for example one class list per sheet. Inside the repeated block, add a number to the placeholder to address each row: {{Name1}} is the first row on the sheet, {{Name2}} the second, and so on.
Data retention
"Clear data" in survey settings deletes responses but keeps your prefill list untouched. You can re-upload previously printed pages or start a fresh collection cycle without rebuilding anything.