PaperSurvey is not just for paper forms. You can also collect responses online through web surveys. This guide walks you through creating and sharing your first web survey.
Step 1: Design your survey
- Click Create Survey on your dashboard
- Enter a name for your survey
- Add questions using the editor
All question types work in both paper and web formats, so you can design your survey once and use it for either collection method.
Step 2: Enable web surveys
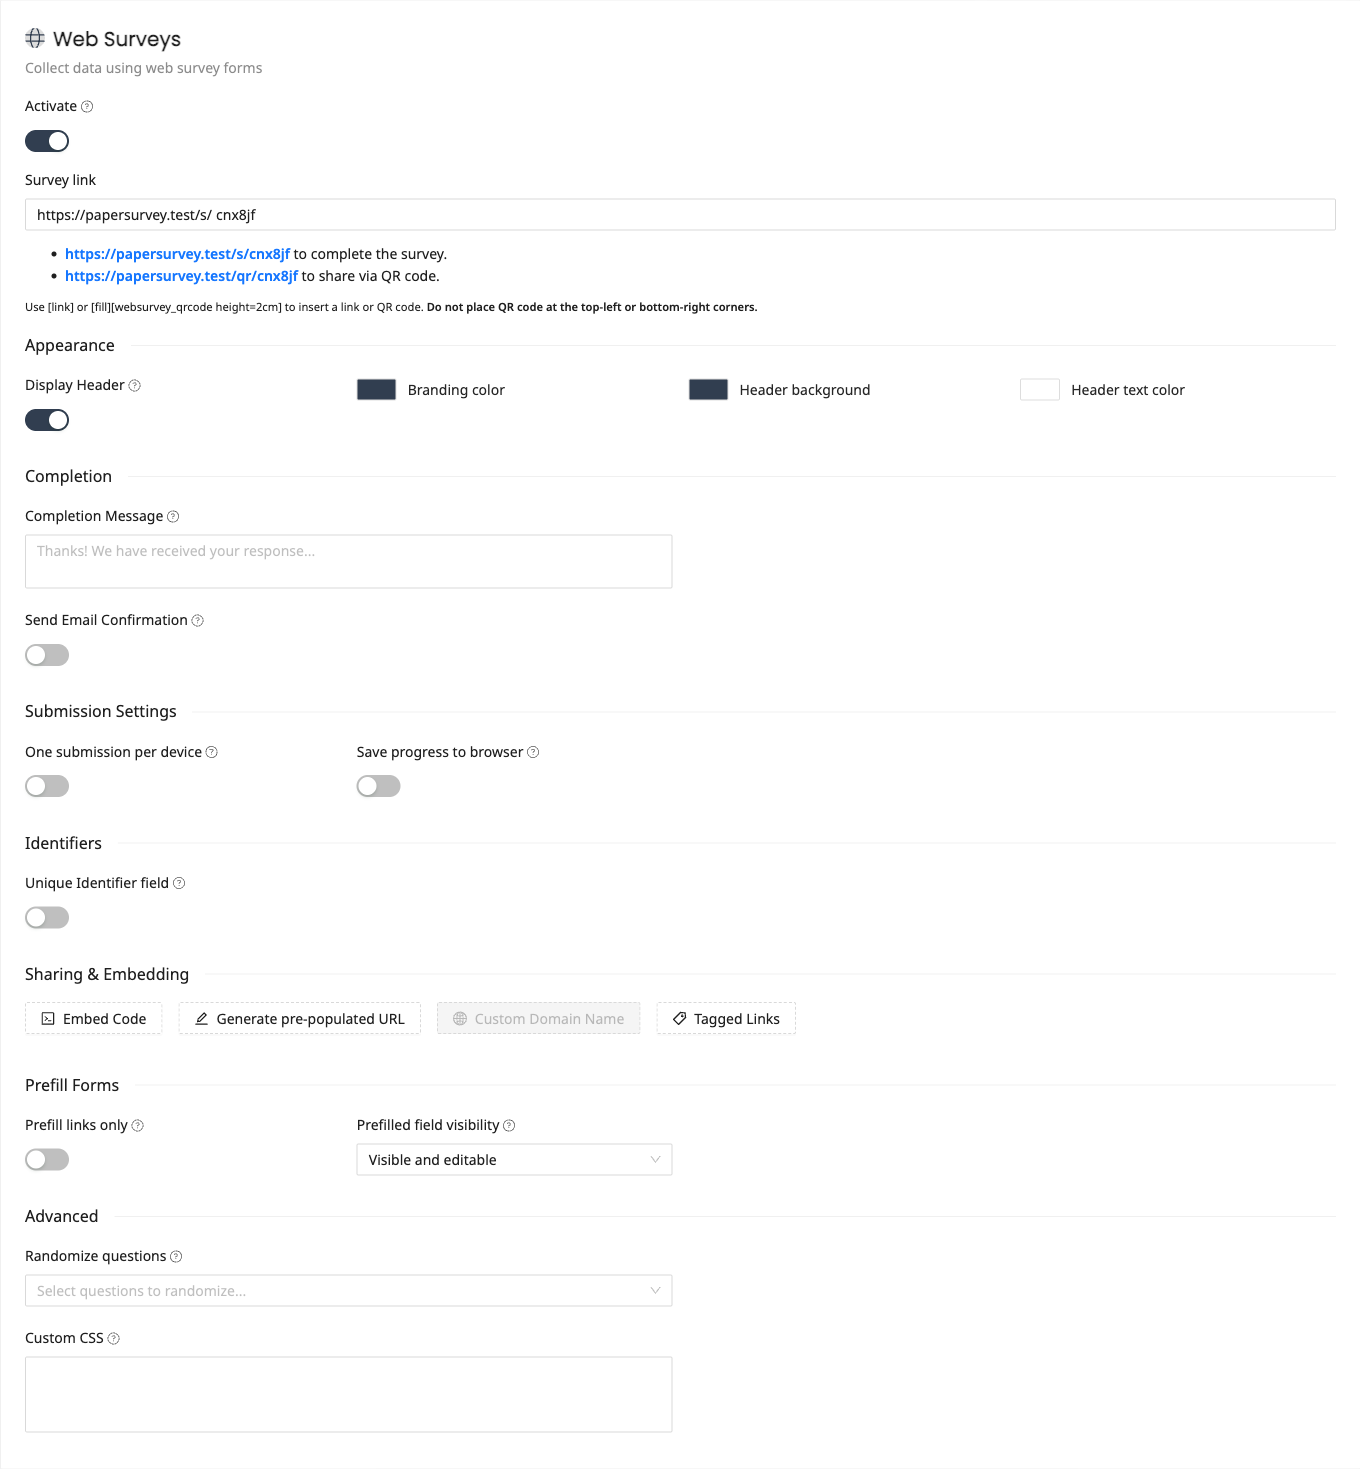
- Open the Settings tab in your survey
- Find the Web Surveys section and enable the Activate toggle
- Save your changes
If the Activate toggle is disabled, verify your email address first. Web surveys require a verified account email.
A unique survey link will be generated automatically (e.g., papersurvey.io/s/abc123).
Step 3: Customize your web survey (optional)
Before sharing, you may want to adjust a few settings:
- Survey link - Change the survey link ending to something memorable (e.g.,
customer-feedback-2026) - Appearance - Show or hide the header and adjust the branding and header colors to match your organization
- Completion Message - Customize the message shown after submission
- Save progress to browser - If a respondent closes the page without submitting, their answers are preserved when they return on the same device
To add introductory text before the first question, place a Heading or Description block at the top of your survey in the editor.
For a full guide on these options, see How to Create a Web Survey.
Step 4: Share your survey
Copy the survey link and share it with respondents through:
- Email - Paste the link into an email invitation
- Social media - Post the link on your channels
- QR code - Use the QR link shown in the Web Surveys settings to share a scannable code on printed materials
- Website embed - Embed the survey directly on a webpage
Step 5: Monitor responses
As respondents submit the survey, their responses appear in real time in the Responses tab. There is no scanning or verification step needed for web responses, so data is available immediately.
Step 6: Close the survey (optional)
When you have collected enough responses, you can close the survey to stop accepting new submissions. Go to survey settings and change the survey status to Closed.
See How to Close a Web Survey for more options.
Step 7: Analyze and export
View your results in the Analysis tab, or export the data from the Export menu. Web survey responses are stored in the same format as paper responses, so you can combine both collection methods seamlessly.